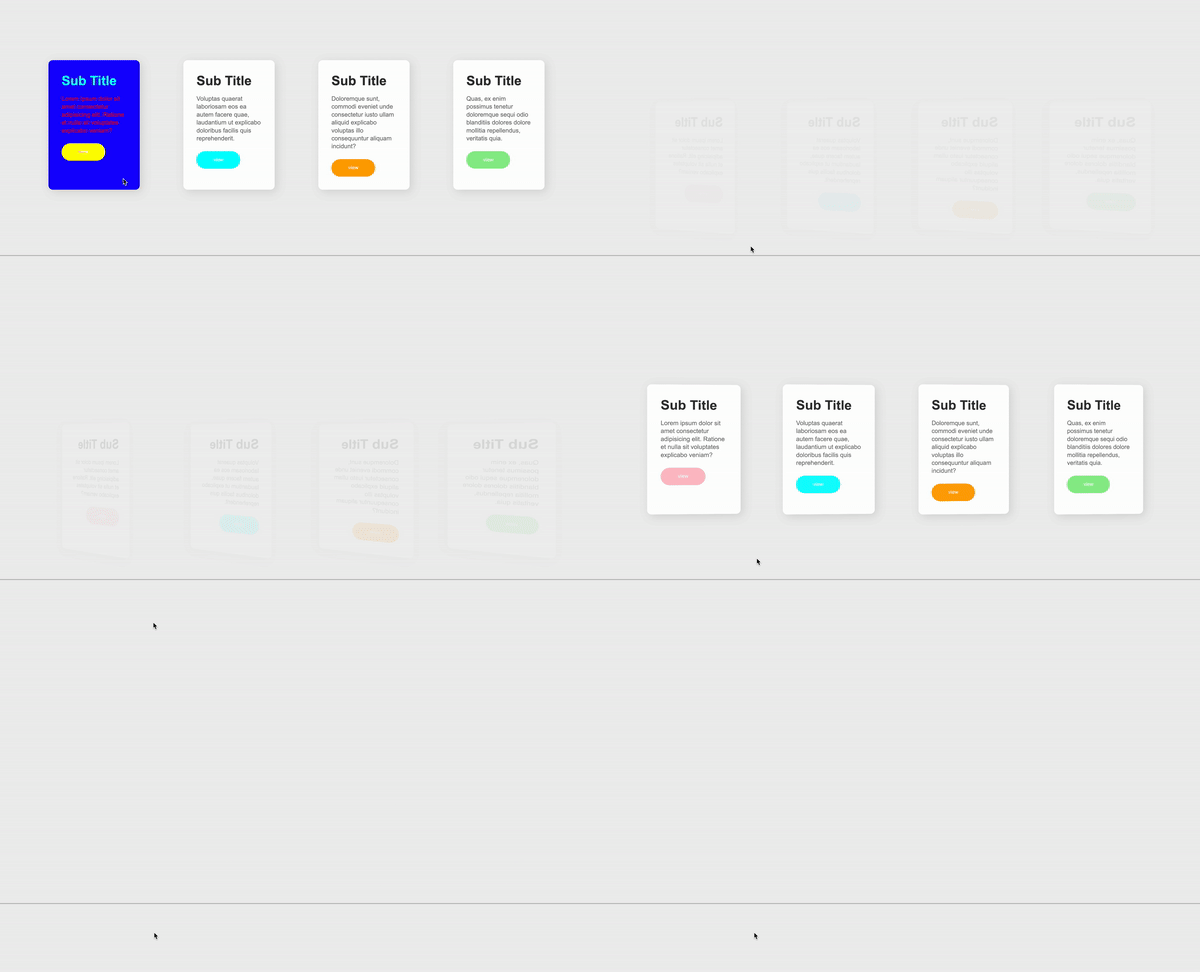
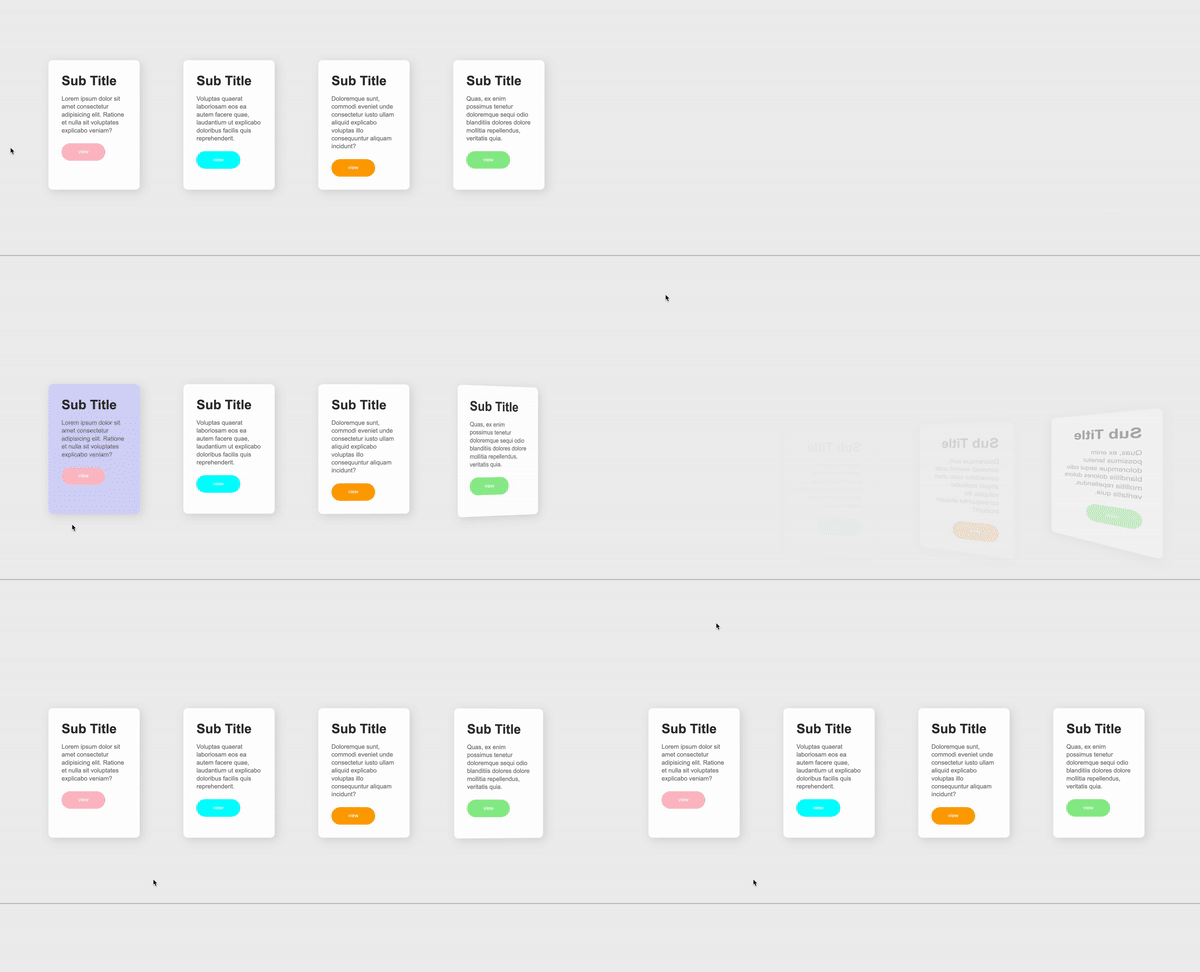
반복문을 이용해서 마우스를 올렸을 때 부드럽게 시간차가 발생하며 아래에서 위로 올라오는 모션을 만들어보겠습니다
먼저 만약에 아래 코드 괄호에 아무런 값이 들어가 있지않으면 에러가 발생합니다
    &:nth-of-type(1) a {
      @include button();
    }
그러므로 기본값으로 대체할 곳이 필요한데 이때 mixin 함수에 기본값을 적용해놓습니다
@mixin button($wid: 100px이렇게 되면 괄호에 아무것도 적지 않더라도 기본적으로 button은 100px을 가지고 있습니다
추가적으로 $bg도 넣어줍니다 그렇다면 background도 인수 값으로 변경합니다
@mixin button($wid: 100px, $bg: gray) {
  display: block;
  width: $wid;
  height: 40px;
  border-radius: 20px;
  background: $bg;
이제 각각 버튼에 색을 넣어보겠습니다
&:nth-of-type(1) a {
      @include button($bg: pink);
    }
    &:nth-of-type(2) a {
      @include button($bg: aqua);
    }
    &:nth-of-type(3) a {
      @include button($bg: orange);
    }
    &:nth-of-type(4) a {
      @include button($bg: lightgreen);
    }
이제 style.scss에서만 작성합니다
부모인 .wrap에다가 마우스가 떠나있으면 안보이다가 마우스를 올리면 다시 보이도록 설정하겠습니다
a 태그 내용을 변경합니다 현재 a 태그가 item의 nth-of-type을 되어있으니 nesting를 합니다
중괄호를 열고 그 안에 a 태그를 넣습니다
&:nth-of-type(1) {
      a {
        @include button($bg: pink);
      }
    }
    &:nth-of-type(2) {
      a {
        @include button($bg: aqua);
      }
    }
    &:nth-of-type(3) {
      a {
        @include button($bg: orange);
      }
    }
    &:nth-of-type(4) {
      a {
        @include button($bg: lightgreen);
      }
    }
각각의 article에 트랜지션 효과를 부여합니다
.item에 효과를 넣습니다
transition: 0.5s;
transform: translateY(100px) rotateY(180deg);
opacity: 0;
원근감을 주기 위해 부모요소인 .wrap에 perspective 효과를 넣습니다
perspective: 600px;.wrap에 hover 했을 때 다시 떠오르도록 해야히니 hover 기능을 넣습니다
&:hover {
    .item {
      transform: translateY(0px) rotateY(0deg);
      opacity: 1;
    }
  }
section의 wrap 영역 밖에 있으면 아무것도 안뜨다가 wrap 영역으로 들어오면 다시 뜨게끔 만들었습니다

각각 article 하나씩 떠오르도록 해보겠습니다 .item nth-of-type에 트랜지션 딜레이 값을 주면 됩니다
&:nth-of-type(1) {
      transition-delay: 0.1s;
      a {
        @include button($bg: pink);
      }
    }
    &:nth-of-type(2) {
      transition-delay: 0.2s;
      a {
        @include button($bg: aqua);
      }
    }
    &:nth-of-type(3) {
      transition-delay: 0.3s;
      a {
        @include button($bg: orange);
      }
    }
    &:nth-of-type(4) {
      transition-delay: 0.4s;
      a {
        @include button($bg: lightgreen);
      }
    }
하지만 하나하나씩 delay 값을 주는게 꽤 비효율적입니다
그래서 반복문을 통해 한번에 처리하겠습니다
@for 부터 지정합니다
@for$i 라는 변수에 카운트될 값을 넣습니다
@for $i from 1 through 4 {

    }
안쪽에 어떤 값이 있어도 $i 값이 1부터 4까지 카운트 되면서 어떤 코드가 4번 반복됩니다
트랜지션 딜레이값도 따로 지정이 가능합니다
@for $i from 1 through 4 {
        &:nth-of-type()
    }
nth-of-type() 괄호안에 $i 값을 넣어야하는데 바로 넣게 되면 카운트가 돌지 않고 $i 가 바로 읽혀버리기 때문에
변수값을 유지할 수 있도록 다르게 작성합니다
&:nth-of-type(#{$i})이렇게 하면 문자 안에 $i에 들어갈 1,2,3,4가 자동으로 치환이 됩니다
여기서 * 별표는 곱하기를 의미합니다 0.2 곱하기 $i ( 4번 돌겠다 ) 의미를 가집니다
@for $i from 1 through 4 {
      &:nth-of-type(#{$i}) {
        transition-delay: 0.2s * $i;
      }
    }
그럼 이제 아래 작성했던 transition-delay를 지우도록 하겠습니다
@for $i from 1 through 4 {
      &:nth-of-type(#{$i}) {
        transition-delay: 0.2s * $i;
      }
    }

    &:nth-of-type(1) {
      a {
        @include button($bg: pink);
      }
    }
    &:nth-of-type(2) {
      a {
        @include button($bg: aqua);
      }
    }
    &:nth-of-type(3) {
      a {
        @include button($bg: orange);
      }
    }
    &:nth-of-type(4) {
      a {
        @include button($bg: lightgreen);
      }
    }
css에서 확인해볼까요?

잘 표현된걸 확인했습니다
또 이것 또한 자주 바뀌는 값이라면 변수를 지정해서 작성할 수 있습니다
$interval: 0.2s;@for $i from 1 through 4 {
&:nth-of-type(#{$i}) {
transition-delay: $interval * $i;
}
}
이 내용을 조금 더 살펴보겠습니다
@for $i from 1 through 4through는 마지막의 숫자 4를 포함합니다
만약 through가 아니라 이렇게 to를 작성한다면 4를 포함하지않고 이전값인 3까지만 읽습니다
@for $i from 1 to 41부터 카운트되는데 처음에 마우스 올렸을 떄 $interval이 딜레이가 있으면 안됨에도 불구하고 0.2s 라는 딜레이가 들어가게됩니다
그렇다면 시작을 1이 아닌 0부터 시작하면 됩니다
@for $i from 0 through 3하지만 또 여기서 문제가 있는데 $i 가 가리키는 첫 번째 nth-of-type은 0이 아니라 1입니다
&:nth-of-type(#{$i})그러면 값이 잘못된 방향으로 가니까 $i에 1을 더해주면됩니다
@for $i from 0 through 3 {
     &:nth-of-type(#{$i + 1}) {
        transition-delay: $interval * $i;
      }
    }
'STYLE SHEET > Sass' 카테고리의 다른 글
| SASS - @if (0) | 2022.06.26 |
|---|---|
| SASS - @each (0) | 2022.06.26 |
| SASS - mixin (0) | 2022.06.26 |
| SASS - 변수 (0) | 2022.06.26 |
| SASS - nesting 기능 소개, 사용법 (0) | 2022.06.24 |
